The guide presumes that you have already installed and configured WooCommerce
WooCommerce
-
Installation
To install the DPD Connect plugin for WordPress and WooCommerce you’ll have to go to the DPD Connect git hub > woocommerce-shipping > Releases > dpdconnect.zip, or click the link here.
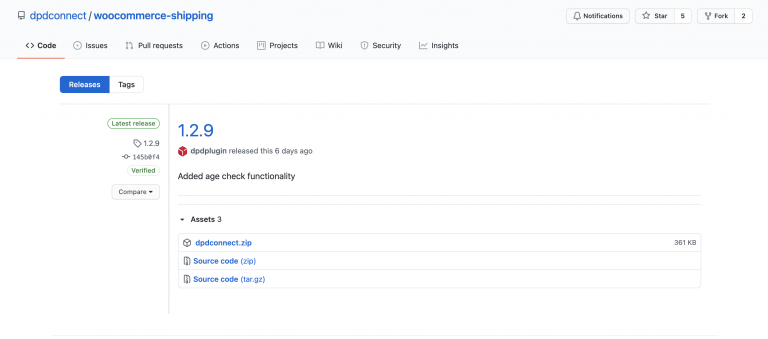
Now that you’ve downloaded the dpdconnect zip file in WordPress admin go to plugins > Add new plugin > Upload plugin and upload the zip file that you’ve just downloaded and click the activate button after installing.
-
Configuration
After installing and activating the plugin go to Menu > DPD Connect > Settings.
General
Go to the tab General in the DPD Connect plugin, here we need to configure a few things these are .
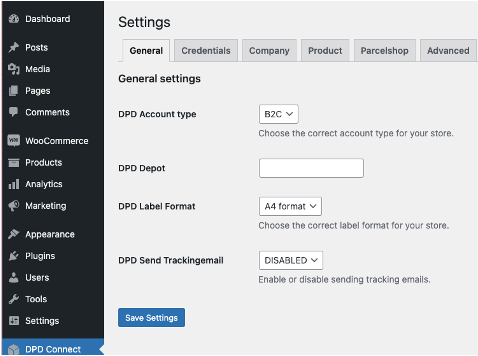
- DPD Account type
- DPD Depot
- DPD Label format
- DPD send tracking email
Credentials
To get to this section you’ll have to go to Menu > DPD Connect > Credentials, Here you need to fill in your DPD Credentials.
- Username(DPD)
- Passwords (DPD)
Company
In this section of the DPD Connect plugin you’ll have to fill in your company information, go to the tab Company of the DPD plugin.
The fields you’ll have to fill out are.

- Company name
- Company address
- Company postal code (Zip code)
- Company country code ISO 2(NL or US)
- Company phone number
- Company email
- Vat number (for customs)
- Eori number (for customs)
- HMRC number (for customs)
Product
This section of the plugin is about the default product(s) attributes simple configuration, go to the tab Product in the DPD plugin.
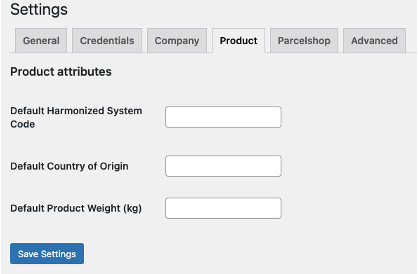
The fields you need to fill in here are.
- Default harmonized system code
- Default country of origin
- Default product weight
Default harmonized system code
Among industry classification systems, Harmonized System (HS) Codes are commonly used throughout the export process for goods. The Harmonized System is a standardized numerical method of classifying traded products. It is used by customs authorities around the world to identify products when assessing duties and taxes and for gathering statistics.
Default country of origin
Set the default country you’re sending your product(s) from.
Parcelshops
This section is about Parcelshop and google maps, unless you are an advanced or high volume user you can choose to use DPD’s keys here
Advanced
These settings are for debugging purposes.
You may leave these settings empty, unless you know what you are doing
-
Enable shipping method
Now that the plug-in has been configured we can enable the shipping methods.
To enable the shipping methods go to:
WooCommerce -> Settings -> Shipping -> Shipping zones -> Choose your shipping zone.After choosing your shipping zone you will need to create a new shipping method.
When creating the new shipping method you will get a drop down menu with choices, from this menu choose ‘DPD shipping method’.When selected and created you can now edit this newly made shipping method.
While editing this shipping method you now have a new section at the bottom of the options.
Here you can configure the shipping method to your needs. -
Create shipment labels
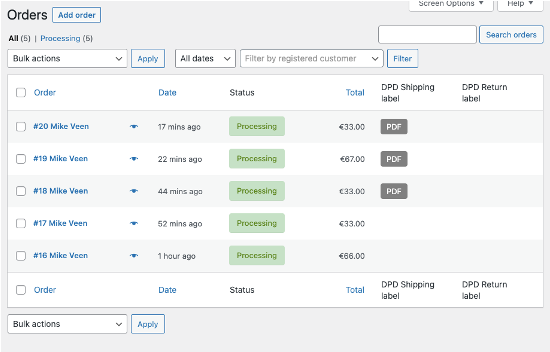
Now that the orders are flowing in we need to make DPD labels to send the orders, to do this go to Menu > Woocommerce > Orders.
Here you will see a table with all of your stores orders to generate a label for these orders simply click the checkbox from the order(s) you want to generate a label for, then from the dropdown menu above ‘orders’ select ‘Create DPD Labels’ and press ‘Apply’. Now you will get a download pop up for the label(s) you’ve selected, if you want to download a label that you’ve already generated again click the ‘PDF’ icon in the table row DPD Shipping Label.
If you want to generate a return label(s) press the checkbox of the order(s) and select ‘Create DPD return Labels’ and click ‘apply’, if you want to re-download a return label click the ‘PDF’ icon in the table row DPD Return label.
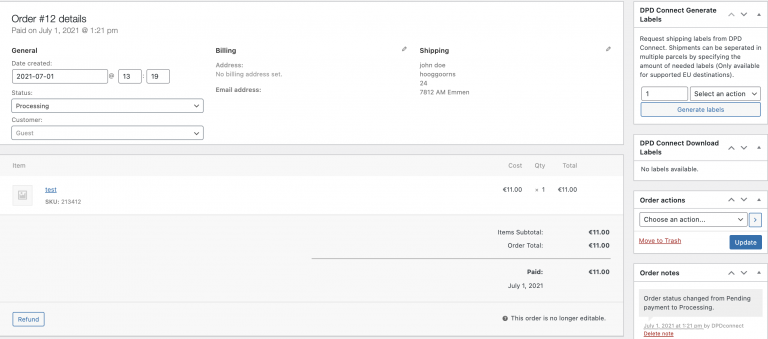
Generating Labels (Single & Bulk)
To generate labels in bulk or for single package go to Menu > Woocommerce > Orders, now click the order you want to generate the DPD label for. Now in the top right of your page you will see a small DPD section with the text ‘DPD Connect generate labels’, here you can fill in the amount of labels you want to generate now select the label you want to generate from ‘select an action’ and click ‘generate labels’.
Return labels (Single & Bulk)
To generate return labels in bulk or for single package go to Menu > Woocommerce > Orders, now click the order you want to generate the DPD label for. Now in the top right of your page you will see a small DPD section with the text ‘DPD Connect generate labels’, here you can fill in the amount of labels you want to generate now select the label you want to generate from ‘select an action’ and click ‘generate labels’.
Shipping list
To generate shipping lists in bulk or for single packages go to Menu > Woocommerce > Orders, now click the order you want to generate the DPD label for. Now in the top right of your page you will see a small DPD section with the text ‘DPD Connect generate labels’, here you can fill in the amount of labels you want to generate now select the label you want to generate from ‘select an action’ and click ‘generate labels’.