Address Book
-
Managing recipients
To manage your recipients, go to “Recipients” in the left pane.
In the following screen you have a number of options:
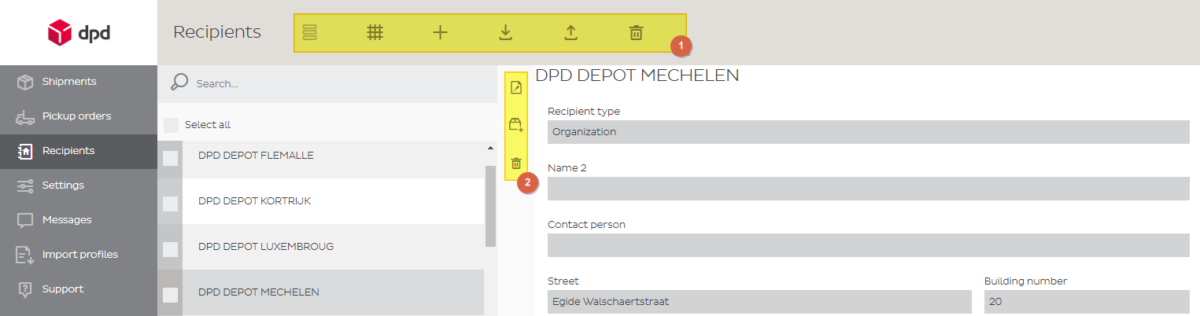
(1) Main options
- List view
- Grid display
- Create a new recipient
- Import recipients
- Export recipients
- Delete ALL recipients
(2) Quick actions
- Edit recipient
- Create shipment for this recipient
- Remove the recipient
-
Creating a new recipient
Click ‘add recipient’
- Fill out the details
- Maximum length of fields as listed below
Name 35 Name2 35 Contact 35 Street 35 Street 35 Building number 8 ZIP-code 8 City 35 Reference 35 Phone 25 Fax 25 E-mail 50 Comment 70 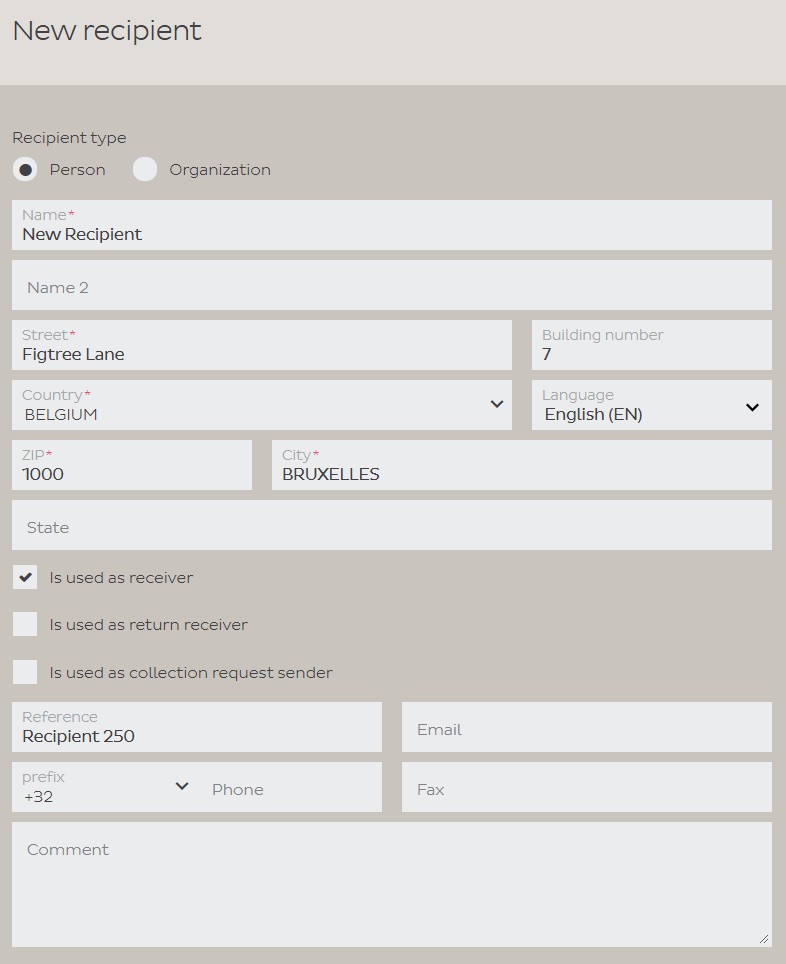
-
Import Addresses
Importing addresses requires a suitable CSV import file (MS Excel) and a matching import profile.
You can learn all about it at the Importing and Exporting help page
-
Export and Backup your Address Book
For various use and for safety reasons you might want to export your address book from time to time.
- Go to Recipients (address book) in the left menu
- Next, click on the Export all Recipients button in the top menu
- Finally, click on Export to CSV. Note: if you have a large address book or slow connection speed, this can take a while.
- This will generate a CSV file. It will normally automatically be saved in your ‘Downloads-folder’.
Address Book
Unfortunately it cannot be restored if you didn’t create a back-up. If you’ve created a back-up, you can import the addresses again following the steps in the ‘Import Addresses‘ section.